
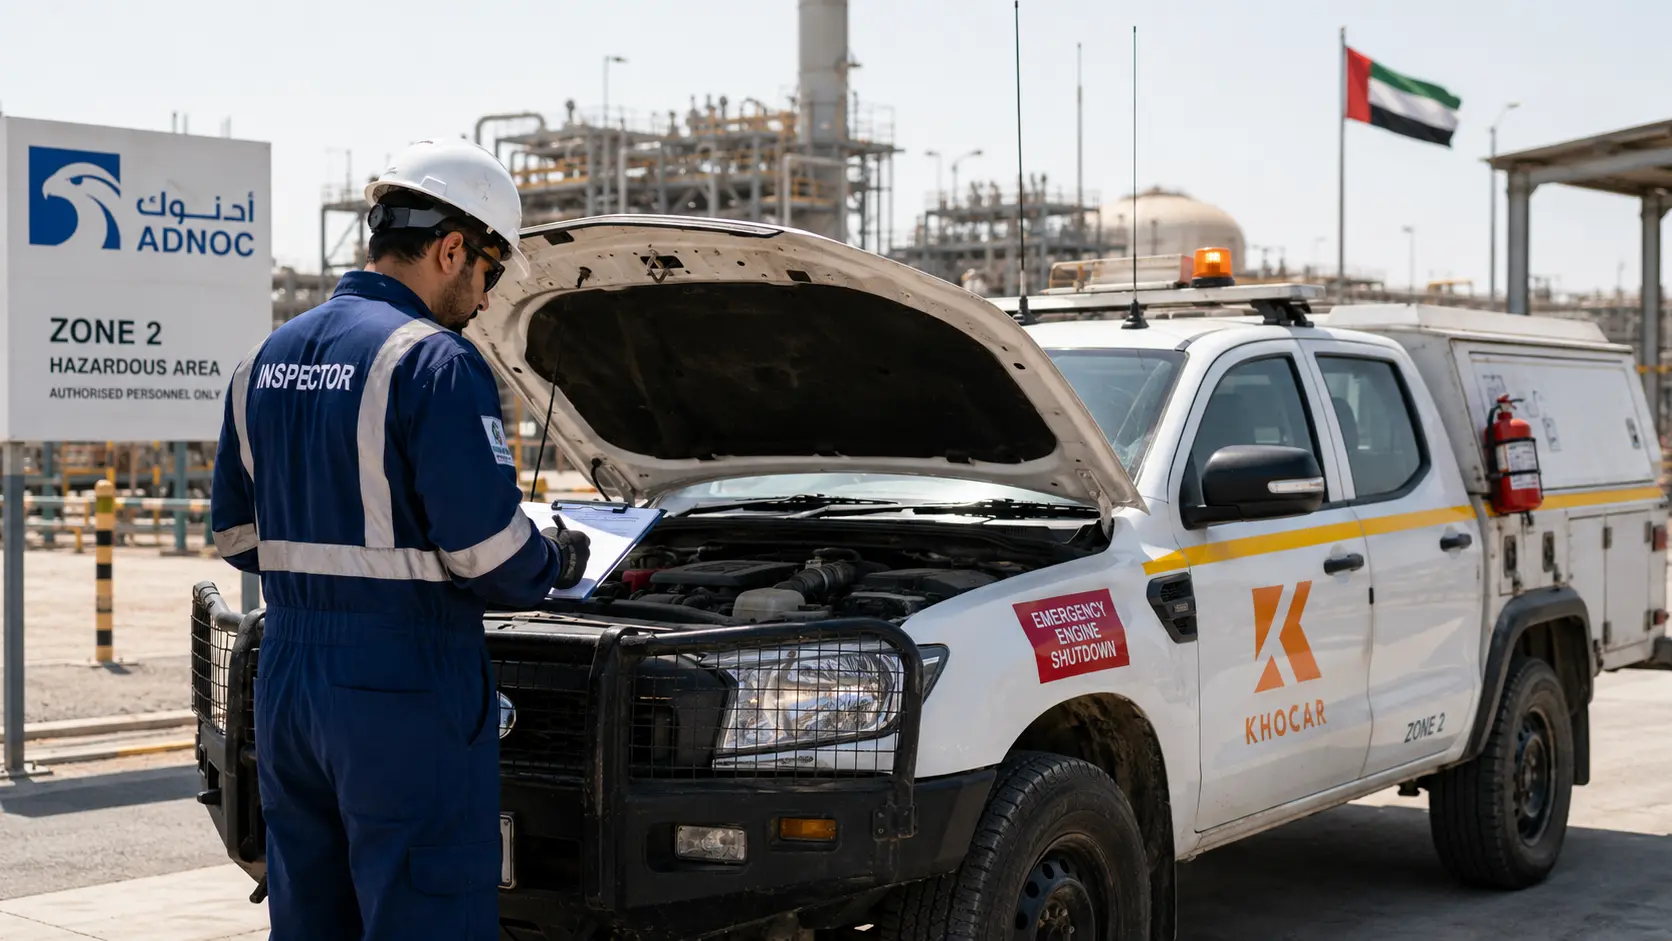
A failed Zone 2 vehicle inspection in Abu Dhabi can stop an otherwise ready project at the worst possible moment. The crew may be inducted, the equipment may already be scheduled, and the mobilization window may be only hours away, yet one unsafe circuit, damaged spark arrestor, missing certificate, or failed shutdown test can send the vehicle back for corrective work.
The delay is not merely administrative. A standard pickup, service truck, generator, compressor, or mobile workshop can introduce hot surfaces, electrical sparks, static discharge, or a running diesel engine into an area where a flammable gas or vapour release could occur briefly.
That is why an ADNOC-related Zone 2 inspection is best treated as a verification of the complete safety system rather than a visual check for a few fitted parts. This guide explains nine common reasons for Zone 2 vehicle inspection failure, what an inspector or project HSE team may be trying to verify, and how contractors can prepare for reinspection before mobilization.
Because requirements differ between assets and projects, use this article as a practical preparation guide, not as a substitute for the latest written site instruction or authorized inspection checklist.
Key Takeaways
- A Zone 2 vehicle can fail even when the main safety components are installed, because inspectors may also review system integration, mounting, wiring, labels, documentation, calibration, and current vehicle condition.
- The conversion must match the actual vehicle, onboard equipment, operating location, and intended work. Copying the scope from another vehicle creates a high risk of rework.
- Common failure points include exhaust protection, diesel air-intake shutdown, gas detection, battery isolation, electrical accessories, anti-static controls, warning systems, and undocumented modifications.
- A certificate alone does not prove that a component is correctly selected, installed, connected, maintained, and functional on the inspected vehicle.
- Before Zone 2 vehicle reinspection, close every observation with evidence: repair record, component data, calibration or functional-test result, photographs, and an updated as-built or inspection file where required.
| Zone 2 vehicles commonly fail ADNOC-related site inspection because the installed safety systems do not match the project scope, documents cannot be verified, spark or shutdown controls do not function, electrical or anti-static protections are incomplete, labels are unclear, or later vehicle modifications have introduced new ignition risks. A structured pre-mobilization test and documentation review can prevent many of these failures. |
What Does a Zone 2 Vehicle Inspection in Abu Dhabi Verify?
A Zone 2 vehicle inspection in Abu Dhabi is generally intended to determine whether a vehicle or mobile equipment unit is suitable for the hazardous-area access and operating conditions defined by the project. It is not the same as the ordinary roadworthiness test for registration. A roadworthiness inspection asks whether the vehicle is safe and legal for public roads; a Zone 2 review asks whether the vehicle could become an ignition source in a classified oil and gas environment and whether the required controls are present, suitable, and working.
The UK Health and Safety Executive defines Zone 2 as an area in which an explosive gas atmosphere is not likely during normal operation and, if it occurs, will exist only for a short time. The lower frequency of a release does not make ordinary vehicle ignition sources acceptable. HSE specifically notes that vehicles, unless specially designed or modified, are likely to contain a range of potential ignition sources.
Public ADNOC engineering specifications also show the broader technical approach used in hazardous areas. For example, ADNOC’s public Fire & Gas System Specification states that hazardous-area classification and protection should comply with IEC 60079, and that instrumentation installed in hazardous areas should be certified by a recognized body. That document is not a vehicle inspection checklist, but it demonstrates why component suitability, certification, environmental rating, and installation quality matter in ADNOC environments.
The inspection normally looks beyond individual parts
- Is the correct safety scope fitted for this specific vehicle and work activity?
- Are the components suitable for the hazardous-area application and supported by traceable documentation?
- Have the systems been installed in a way that preserves their intended protection?
- Do the gas detector, alarms, shutdown controls, isolators, and engine systems work together?
- Are warning labels, operating instructions, and emergency controls visible and understandable?
- Has normal wear, damage, repair work, or a later accessory installation changed the risk?
Why ADNOC Zone 2 Inspection Requirements Can Differ
Contractors often ask for one universal “ADNOC Zone 2 vehicle checklist.” In practice, the required scope can vary because the vehicle is being accepted for a particular project, operator, route, area classification, and task. A crew pickup that only drops personnel at a designated boundary is not the same risk as a service truck that remains running near process equipment. A mobile workshop with work lights, inverters, auxiliary batteries, power tools, hydraulic equipment, and a generator requires a deeper assessment than an otherwise standard transport vehicle.
Factors that can change the inspection scope include:
- The ADNOC Group Company, asset, EPC contractor, or site-access process involved.
- Whether the vehicle enters, parks, idles, loads, unloads, powers equipment, or performs maintenance inside the classified area.
- Vehicle type, engine type, fuel, age, condition, exhaust arrangement, and electrical architecture.
- Onboard equipment such as cranes, compressors, welders, lighting, inverters, battery banks, pumps, and hydraulic power packs.
- The exact hazardous area, gas group, temperature considerations, environmental exposure, and written project HSE instruction.
- The required inspection organization, document format, certificate validity, test evidence, and reinspection process.
Related internal guide: Which vehicles need Zone 2 conversion for ADNOC projects?
Nine Common Zone 2 Vehicle Inspection Failure Points
| Failure point | What may be observed | Why it matters | Pre-mobilization action |
| 1. Wrong scope | Vehicle use or accessories were not included in the assessment | Uncontrolled ignition sources remain | Confirm route, task, operating mode, and all onboard equipment |
| 2. Document gaps | Missing certificates, serial numbers, reports, or inconsistent records | Suitability and traceability cannot be verified | Build one vehicle-specific compliance file |
| 3. Exhaust defects | Loose, damaged, blocked, leaking, or unsuitable spark arrestor/exhaust work | Hot particles, flames, or surfaces may ignite vapour | Inspect, clean, mount, and test exhaust protection |
| 4. Shutdown failure | Air-intake shutoff does not trip, reset, or fully stop the engine | A diesel engine may ingest vapour and overspeed | Functional-test the entire shutdown path |
| 5. Gas system failure | Detector is uncalibrated, poorly placed, or not connected to alarms/shutdown | The vehicle may not react to a gas release | Verify calibration, set points, alarms, and final shutdown action |
| 6. Electrical defects | Exposed wiring, unfused circuits, unsafe lights, poor glands, or isolator bypass | Electrical faults can create sparks or hot surfaces | Audit every original and added circuit |
| 7. Static control failure | Worn strap, poor contact, corrosion, paint insulation, or broken bonding | Charge may not dissipate safely | Verify continuity and real ground contact |
| 8. Control/label gaps | Emergency controls or indicators are hidden, unclear, damaged, or unlabeled | Operators may respond incorrectly or too slowly | Standardize labels and demonstrate control logic |
| 9. Condition/changes | Leaks, loose mounts, damage, or new accessories after conversion | The current vehicle no longer matches the approved state | Freeze configuration and conduct a final walkdown |
1. The Conversion Scope Does Not Match the Vehicle’s Actual Use
The first failure often happens before any component is fitted: the conversion was based on incomplete information. A contractor may request a “standard pickup Zone 2 package,” but the vehicle is later used as a field-service unit with an inverter, rechargeable tools, an auxiliary light, a refrigerator, a two-way radio booster, a fuel transfer pump, or a compressor in the bed. Each added system can change the ignition-source review and the wiring, isolation, mounting, labeling, or documentation required.
Typical scope mismatches include:
- The inspection request describes a transport vehicle, but the vehicle will idle or operate equipment inside the hazardous area.
- An auxiliary battery, inverter, work light, beacon, camera, tracker, radio, charger, or powered tool was not disclosed.
- The quoted scope came from another vehicle model with a different engine, exhaust, intake, battery location, or electrical system.
- The team prepared for Zone 2 access, but the latest project instruction requires a different test, document, or component standard.
- The vehicle’s route or task changed after conversion, moving it closer to a source of release or requiring it to remain in the area longer.
Example: the “same model” assumption
Suppose a fleet has two visually identical diesel pickups. One is a basic crew vehicle; the other has a canopy, additional lighting, a second battery, a power inverter, and charging points for inspection instruments. Treating both vehicles as the same conversion can leave the second vehicle with unreviewed circuits and equipment. The correct fix is not to add one more sticker. The provider should reassess the complete configuration and update the installation and documentation accordingly.
How to prevent failure:
- Send vehicle make, model, year, engine, fuel type, registration/VIN details, and clear photographs.
- List every factory and non-factory electrical or mechanical accessory.
- Describe where the vehicle will go, what it will do, whether the engine remains running, and what equipment will operate.
- Attach the latest written site-access, HSE, inspection, or EPC requirement before work begins.
- Do not add accessories after the final assessment without change review.
2. Documentation Is Missing, Expired, Inconsistent, or Untraceable
A vehicle may look technically complete and still fail because the inspector cannot verify what was installed, whether the component is suitable, or whether the tested vehicle is the same vehicle described in the file. Hazardous-area compliance depends heavily on traceability. A generic certificate downloaded from the internet does not necessarily prove that the exact model, variant, serial number, configuration, or environmental rating on the vehicle is covered.
Common document problems include:
- The vehicle registration, chassis number, fleet number, or plate does not match the report.
- Component model or serial numbers are missing, unreadable, or different from the supporting certificate.
- A calibration certificate has expired or does not identify the installed gas detector.
- The installation drawing or wiring diagram no longer matches the vehicle after repairs or modifications.
- The report lists a shutdown or isolator that is not fitted, or the fitted item is absent from the report.
- Inspection photographs are outdated or too unclear to prove location and mounting.
- Certificates are provided without the pages, schedules, limitations, or conditions needed to interpret them.
- The file does not include the latest corrective-action closure or previous inspection observations.
Build one vehicle-specific compliance file
The most efficient approach is to assemble one indexed file for each vehicle. Depending on the project requirement, that file may include the written scope, vehicle details, equipment list, component data sheets, certificates, serial-number register, calibration evidence, wiring or interface diagram, photographs, functional-test results, installation report, previous observations, and signed corrective-action closure. Keep the file synchronized with the physical vehicle.
Related internal guide: Zone 2 vehicle conversion checklist for ADNOC site access
3. The Spark Arrestor or Exhaust Protection Is Defective
A vehicle exhaust can create several hazards: hot surfaces, flames or sparks from incomplete combustion, and hot particles. A spark arrestor is intended to reduce the chance of incandescent material being discharged, but it is not effective simply because it is present. Its design, condition, installation, maintenance, and compatibility with the engine and exhaust system matter.
Reasons the exhaust system may be rejected or require corrective work include:
- The spark arrestor is loose, cracked, corroded, heavily contaminated, blocked, or physically damaged.
- There is an exhaust leak upstream or downstream that bypasses the intended protection.
- The unit is installed in the wrong orientation, with poor support, inadequate clearance, or an unsafe discharge direction.
- The arrestor is not suitable for the engine size, operating temperature, backpressure, or application.
- A repair, muffler replacement, or exhaust modification changed the original installation.
- Hot surfaces remain exposed where the project requires guarding, shielding, spacing, or another control.
- Maintenance records do not show inspection or cleaning, and a functional or visual check finds excessive buildup.
Why a dirty or poorly fitted arrestor is not a minor defect
Excessive restriction can affect engine performance and temperature, while a leak can release hot exhaust before it reaches the arrestor. The fix should therefore include an exhaust-path inspection, correct mounting, leak check, condition assessment, and confirmation that the selected device suits the vehicle—not just cleaning the visible outlet.
4. The Diesel Air-Intake Shutdown or Overspeed Protection Does Not Work
Diesel engines create a special hazardous-area risk because flammable vapour can be drawn into the air intake and act as an uncontrolled external fuel source. Turning the ignition key off may stop normal fuel injection, but it may not stop an engine that is running on vapour entering through the intake. OSHA explains that the way to prevent mechanical failure and possible explosion in this situation is to cut off the intake air supply using a system such as an automatic engine overspeed shutdown device.
This risk is not theoretical. OSHA’s fact sheet cites a refinery explosion that killed 15 people and injured nearly 200, with an idling diesel pickup identified as the most likely ignition point. The same publication also describes a runaway diesel-engine fire that killed three workers and injured four. These incidents occurred outside the UAE, but they demonstrate why engine shutdown protection is treated as a critical safeguard rather than an optional accessory.
Common shutdown-system failure modes include:
- The air-intake valve is incorrectly sized, mounted, adjusted, or connected.
- The valve closes partially but does not fully stop airflow and engine combustion.
- The trip cable, solenoid, actuator, linkage, or reset mechanism is seized or damaged.
- The system trips at an incorrect threshold or does not respond to the test method.
- The gas detector alarm activates, but the signal does not reach the engine shutdown circuit.
- The driver cannot identify the emergency control or does not know the reset procedure.
- A later intake, turbocharger, filter, or engine repair changed the installation geometry.
Test the final result, not just the switch
A good pre-inspection test verifies the complete chain: initiating condition, alarm or command, actuator movement, air shutoff, engine stop, visible indication, fault response, and reset. A dashboard lamp that illuminates is not proof that the engine will stop.
Technical explainer: How Chalwyn valves help stop diesel runaway in Zone 2 environments
5. Gas Detection and Automatic Shutdown Do Not Function as One System
A gas detector is valuable only when it can detect the relevant hazard, provide a clear warning, and trigger the action required by the project. Problems arise when the detector is treated as a separate accessory rather than part of a safety function. A sensor may power on and display a normal reading, but the complete system can still fail because the detector is out of calibration, located poorly, configured incorrectly, or not connected to the engine and electrical shutdown logic.
Inspection observations may include:
- Calibration is overdue, unsupported, or completed with the wrong gas or procedure.
- The sensor is obstructed, contaminated, damaged, exposed to water ingress, or placed where airflow prevents representative detection.
- Alarm set points or delays do not match the approved design or project instruction.
- Audible and visual alarms are weak, hidden, or not distinguishable from normal vehicle warnings.
- The detector alarms but does not isolate non-essential electrical circuits or stop the engine as required.
- The system can be bypassed without authorization, or a bypass is active during inspection.
- A fault, low-power, or sensor-failure condition does not create a clear warning or safe response.
Calibration and bump testing are different
A bump test checks whether a detector responds to gas and activates its alarms. Calibration adjusts the instrument so its reading corresponds to a known gas concentration. The project procedure may require one or both at defined intervals. A current certificate should identify the instrument and support the actual installed configuration; it should not be assumed that a bench-tested sensor proves the vehicle’s shutdown interface works.
6. Unsafe Electrical Accessories, Wiring, or Battery Isolation
Electrical modifications are among the easiest problems to create after a vehicle has been prepared. A driver adds a phone charger, a mechanic installs a brighter work light, a tracker company taps into an ignition wire, or a workshop reroutes a cable after collision repair. Each change may seem small, yet poorly protected wiring can arc, overheat, short to the body, or bypass the intended isolation system.
OSHA’s hazardous-location rules emphasize that electrical equipment and wiring must be suitable for the classification of the location. HSE guidance similarly says areas classified into zones must be protected from ignition sources and that equipment selection must match the zone.
Common electrical failure points include:
- Exposed conductors, damaged insulation, loose terminals, unsupported cable, or chafing at metal edges.
- Unfused additions or fuses installed too far from the power source.
- Improvised connectors, household components, tape-only joints, or open terminals.
- Unsafe cable glands, enclosure entries, or seals that allow dust, water, or mechanical damage.
- Non-reviewed work lights, beacons, cameras, radios, trackers, chargers, inverters, or auxiliary sockets.
- A battery isolator that does not disconnect all circuits intended by the design.
- Essential safety circuits accidentally isolated, or non-essential circuits left energized.
- The isolator is hidden, mislabeled, difficult to operate, or mechanically damaged.
- Wiring diagrams and labels no longer reflect the current configuration.
Why “it works” is not enough
Normal operation only proves that current reaches the accessory. It does not prove that the circuit is correctly protected against short circuit, overload, heat, vibration, moisture, accidental damage, or ignition risk. The inspection should evaluate routing, protection, isolation, component suitability, and failure behaviour; not merely whether the lamp turns on.
7. Anti-Static Bonding or Grounding Controls Are Ineffective
Moving vehicles, flowing liquids, belts, hoses, tyres, and isolated metal parts can accumulate electrostatic charge. A visible anti-static strap may be required as part of the project’s control strategy, but appearance alone does not prove effective dissipation. A strap that is worn short, insulated from the chassis by paint, coated with oil, hanging above the ground, or touching only when the vehicle is heavily loaded may fail its purpose.
Typical anti-static defects include:
- The strap does not maintain effective contact with the ground under normal vehicle loading.
- The chassis connection is loose, corroded, painted, contaminated, or mechanically weak.
- The strap is cracked, cut, hardened, missing, or made from an unsuitable material.
- A body, tank, skid, canopy, or mounted item is electrically isolated and not bonded as required.
- Continuity has not been checked after body repair, repainting, component replacement, or installation work.
- The project requires another static-control method, but the vehicle relies only on a generic hanging strap.
Use measurement where the requirement calls for it
The pre-inspection review should confirm the specified control, inspect every connection, and perform the continuity or resistance test required by the project or inspection procedure. Record the result against the vehicle and test instrument. Do not invent a pass/fail value; use the latest project criterion.
8. Emergency Controls, Warning Indicators, and Labels Are Unclear
A technically functioning system can still be unsafe when the operator cannot understand it. Emergency stop controls may be hidden behind the seat, labels may use abbreviations that drivers do not recognize, an alarm lamp may be too dim in sunlight, or the gas detector may sound the same tone as a reversing warning. Inspectors often need to see that the controls are accessible, identified, durable, and consistent with the documented operating logic.
Common presentation and human-factor problems include:
- Emergency shutdown, battery isolation, reset, or manual trip controls are not clearly identified.
- Labels are missing, peeling, faded, oil-covered, contradictory, or not in the required language or format.
- The warning indicator is blocked by equipment or cannot be seen from the driver’s normal position.
- The driver cannot explain what each alarm means or what action to take.
- The control sequence described in the procedure differs from the actual vehicle.
- A bypass or override exists without clear authorization, indication, or control.
- The required hazardous-area, inspection, fleet, or certification identification is missing or unreadable.
A simple operator demonstration can reveal hidden faults
Before mobilization, ask a driver who was not involved in the installation to identify the gas alarm, manual shutdown, battery isolator, reset control, and required response. If the driver hesitates or gives the wrong sequence, the vehicle is not inspection-ready. Improve the labels, instructions, and training before the formal review.
9. Poor Vehicle Condition or Post-Conversion Changes Undermine Compliance
Zone 2 preparation is not a permanent shield against normal wear and uncontrolled change. A vehicle can leave the conversion workshop in good condition and arrive for inspection with an oil leak, loose exhaust bracket, cracked sensor mount, damaged cable, worn anti-static strap, weak battery, added accessory, or collision repair that changed the approved installation. The inspector is assessing the vehicle that is physically present, not the vehicle shown in old photographs.
Condition-related concerns include:
- Fuel, oil, hydraulic fluid, coolant, or exhaust leaks.
- Loose, corroded, cracked, or vibration-damaged mounts and brackets.
- Missing fasteners, guards, protective covers, grommets, clamps, or seals.
- A weak electrical system that creates false alarms or unreliable shutdown behaviour.
- Body repairs, repainting, engine work, exhaust work, or accessory installation after certification.
- A safety device that has been bypassed because it caused nuisance trips.
- Dirty, obstructed, inaccessible, or poorly maintained safety components.
- The vehicle carries loose tools, batteries, fuel containers, or powered equipment not included in the scope.
Use configuration control after the conversion
Once the vehicle has passed its final technical review, treat the accepted configuration as controlled. Require approval before adding equipment or changing wiring, intake, exhaust, bodywork, batteries, or mounted systems. Keep a change log and update the drawings, photographs, component register, and test file whenever an authorized modification is completed.
How to Prepare for Zone 2 Vehicle Reinspection
A reinspection should not be approached as a second attempt to “see what happens.” It should be a controlled closeout of every observation. The fastest route is to convert the inspection report into an action register, assign each item to a competent person, record the corrective work, and verify the final system before booking the next inspection.
Step 1: Read the exact observation and acceptance criterion
Do not repair what you assume the inspector meant. Confirm whether the issue concerns component suitability, installation, functionality, documentation, calibration, labeling, maintenance, or a project-specific requirement. When the observation is unclear, obtain clarification through the authorized project channel.
Step 2: Identify the root cause
A blown fuse may be the symptom, while cable chafing is the cause. A failed shutdown may be caused by a detector output, relay logic, actuator, air leak, valve setting, wiring fault, or low voltage. Fixing only the visible symptom creates a high risk of repeat failure.
Step 3: Complete corrective work without introducing new changes
Correct the defined issue using suitable components and competent installation methods. Avoid unrelated “improvements” during the same work unless they are reviewed and documented, because each new change can create another inspection question.
Step 4: Verify the complete safety function
Repeat visual checks, electrical checks, continuity checks, calibration or bump testing, alarm verification, isolation tests, and engine shutdown tests as applicable. Confirm that the system behaves correctly in normal, alarm, fault, and reset conditions.
Step 5: Close the observation with evidence
Prepare a clear closeout package: observation number, corrective action, responsible party, date, component or serial details, before-and-after photographs, test result, certificate or report, and confirmation that the vehicle file was updated. This helps the reinspector verify the work efficiently.
Step 6: Conduct an independent pre-reinspection walkdown
Ask someone who did not perform the repair to check the vehicle against the observation list and current project requirements. Independent review is valuable because technicians can become familiar with their own work and overlook a missing label, loose clamp, or outdated document.
Pre-Mobilization Checklist for ADNOC Vehicle Compliance
| Area | Pre-mobilization verification | Evidence to retain |
| Scope | Vehicle, route, task, operating mode, and onboard equipment match the approved assessment | Written requirement and equipment list |
| Identity | Registration, VIN/chassis, plate, fleet number, make/model/year, and engine details are correct | Vehicle identity sheet and photographs |
| Exhaust | No leaks; arrestor and guards are suitable, secure, clean, and undamaged | Inspection/maintenance record and photographs |
| Engine shutdown | Manual and automatic shutdown stop the engine and reset correctly | Functional-test report |
| Gas detection | Calibration is current; sensor, alarms, fault warning, and shutdown interface operate | Calibration and integrated-test evidence |
| Electrical | All circuits, accessories, protection, cable routing, glands, enclosures, and isolation match the design | Wiring diagram, component register, test results |
| Static control | Strap/bonding is intact, connected, and tested to the project criterion | Continuity/resistance test record |
| Controls and labels | Emergency controls and indicators are visible, durable, and understood by the driver | Photographs and operator briefing record |
| Vehicle condition | No leaks, damage, loose mounts, unauthorized modifications, or unlisted equipment | Final inspection checklist |
| Documents | Certificates, data sheets, serial numbers, reports, and closeout records are complete and current | Indexed compliance file |
| Important distinction Passing a workshop pre-check does not guarantee site acceptance. Final approval remains with the authorized inspection and project/site process. The purpose of a pre-check is to find and correct avoidable defects before the formal inspection and mobilization deadline. |
What Should You Do After a Zone 2 Vehicle Inspection Failure?
First, keep the vehicle configuration unchanged until the observations are understood. Obtain the written failure or punch-list report, identify which requirements are project-specific, and share the complete file with a competent Zone 2 service provider. Do not replace components randomly or use the lowest-cost substitute without confirming suitability and documentation. A quick unapproved repair can turn one observation into several.
A practical response sequence is:
- Secure the written observations and the applicable inspection or project requirement.
- Photograph the vehicle and each affected system before work begins.
- Separate safety-critical functional failures from document, labeling, and maintenance issues.
- Confirm parts availability, competent labor, test equipment, calibration, and the reinspection timeline.
- Complete root-cause repair and integrated testing.
- Update the vehicle file and prepare a numbered corrective-action closure package.
- Perform an independent final walkdown before the vehicle returns for reinspection.
Planning resource: Zone 2 vehicle conversion cost, timeline, and document factors in Abu Dhabi
Prepare Your Vehicle Before Mobilization with KhoCAR
A failed inspection can delay site access, crews, equipment, and project commitments. KhoCAR supports contractors and fleet teams with Zone 2 installation and certification preparation in Abu Dhabi, including vehicle assessment, safety-system installation, documentation support, functional testing, and inspection-readiness work tailored to the applicable project requirement.
Share the vehicle make and model, engine and fuel type, intended ADNOC-related project or operating area, onboard equipment, current modifications, mobilization deadline, and any written HSE or inspection requirement. The earlier the complete scope is reviewed, the easier it is to avoid last-minute rework.
Main service page: Zone 2 Installation & Certification Abu Dhabi
FAQs
What is checked during a Zone 2 vehicle inspection in Abu Dhabi?
The inspection may review the vehicle’s hazardous-area scope, exhaust protection, diesel shutdown, gas detection, electrical isolation, wiring, anti-static controls, warning systems, labels, documentation, and current mechanical condition. The exact checklist depends on the project, vehicle, operating area, and authorized inspection process.
Why did my vehicle fail an ADNOC Zone 2 inspection?
Common reasons include a scope mismatch, missing or inconsistent documents, defective spark arrestor or shutdown systems, uncalibrated gas detection, unsafe electrical additions, poor static control, unclear labels, and modifications made after the original conversion. Use the written observation report to identify the exact cause.
Is an ADNOC roadworthiness test the same as a Zone 2 vehicle inspection?
No. A normal ADNOC Distribution vehicle inspection is used for road safety, registration, transfer, or modification services. A Zone 2 inspection concerns suitability for a classified hazardous-area project and may involve ignition-source controls, certified equipment, integrated safety systems, and project-specific documents.
Does every vehicle need the same Zone 2 conversion?
No. The required scope can change with the vehicle type, engine, onboard equipment, route, work activity, hazardous area, operator, and project instruction. A basic crew pickup may require a different assessment from a mobile workshop, crane, compressor, generator, or vacuum truck.
Can a vehicle pass with only a spark arrestor and anti-static strap?
Not necessarily. Those items may form part of a conversion, but other controls can include diesel air-intake shutdown, gas detection, electrical isolation, suitable wiring and accessories, alarms, labels, documentation, and testing. The applicable project requirement determines the complete scope.
Are ATEX or IECEx certificates enough for ADNOC vehicle compliance?
A valid certificate can support component suitability, but it does not by itself prove that the correct product was selected or that it was installed, connected, configured, maintained, and tested correctly on the vehicle. The inspection may also require vehicle-specific documentation and project approval.
What is required for a Zone 2 vehicle reinspection?
Normally, each inspection observation should be corrected and closed with evidence such as repair records, component details, photographs, calibration or functional-test results, and updated documents. The vehicle should be independently checked against the current requirement before the reinspection is booked.
How long does it take to fix a failed Zone 2 inspection?
The timeline depends on the number and severity of observations, parts availability, calibration or testing needs, documentation gaps, and the reinspection schedule. A label correction may be quick, while a failed shutdown interface, unsuitable component, or undocumented electrical system can require deeper work.
Can I add electrical accessories after Zone 2 certification?
Do not add accessories without a change review. New lights, trackers, radios, chargers, inverters, cameras, battery systems, or tools may alter the approved wiring, isolation, ignition-source risk, and documentation. Obtain approval and update the vehicle file before use.
How can I reduce the chance of an ADNOC vehicle compliance delay?
Confirm the latest written project requirement early, provide complete vehicle and equipment details, use a competent Zone 2 provider, freeze the configuration before inspection, function-test the complete safety system, and prepare one indexed vehicle-specific compliance file.